martes, 29 de marzo de 2016

La pared de mi estudio - The wall in my studio (video)

Hola hola! En el vídeo de hoy os enseño la pared de mi estudio (esa que aparece como fondo de todos mis vídeos). Más de una vez me habéis pedido que os enseñe los proyectos que hay en ella, así que eso hago en el vídeo y también os cuento cómo pego los layouts a la pared.

Espero que os guste y si tenéis alguna mejor forma de sujetar los layouts a la pared, me encantará que me la contéis! Hasta el próximo vídeo!

****

Hey friends! In today's video I show the wall of my study (which appears as the background of all my videos). More than once you have asked to showyou the projects on it, so today I'm doing It and I tell you how I hang my layouts onto the wall.

I hope you like it and if you have a better way to hang the layouts to the wall, I´d love to know your way! See you in the next video!


lunes, 28 de marzo de 2016

Semanas 9 y 10 - 2016 Documented - Weeks 9 & 10

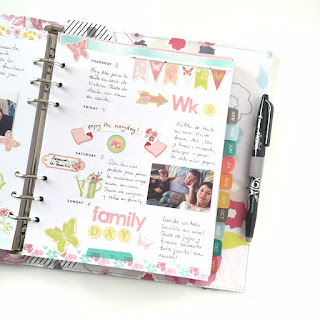
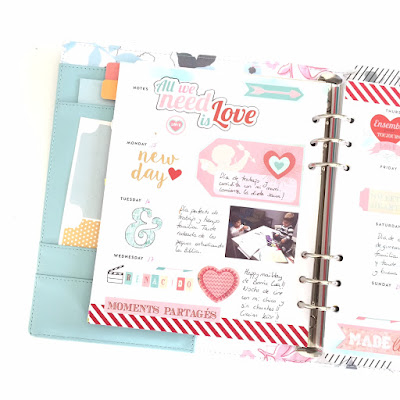
Hola hola!! Por aquí las fiestas parecen no tener fin y con los niños en casa no hay quién adelante faena, pero he conseguido poner un poquito al día mi "2016 Documented" y aquí os traigo las primeras dos semanas de marzo, que como es el mes de la primavera he decidido utilizar los elementos decorativos de la preciosa colección "Jardin Secret" de la marca Toga. Los stickers, rub-ons y die-cuts son perfectos para decorar en la agenda!

****

Hey friends!! Here the holidays seem endless and with children at home It's kind of impossible get work done, but I managed to update a little bit my "2016 Documented" and here I show you the first two weeks of March. And as It is the month of spring I decided to use the decorative elements of the precious collection "Secret Garden" of the French brand Toga. The stickers, rub-ons and die-cuts are perfect for decorating your planners!


Semana 9 // Week 9


Semana 10 // Week 10


Espero que os haya gustado! Mañana un nuevo vídeo!

****

Hope you liked It! Tomorrow a new video will be available!


martes, 22 de marzo de 2016

Tutorial tarjetería - Hello Spring - Cardmaking tutorial

Hola hola! Ya estamos en primavera y aunque por aquí está lloviendo, el vídeo de hoy va de flores. Hoy os quiero enseñar unos sellos que he descubierto hace poco, de la marca norteamericana Altenew, que me han encantado. Se trata de unos sellos de flores en tres capas, que simplemente estampando capa sobre capa con diferentes tonalidades de un mismo color se consigue un efecto de profundidad chulisimo.

También os enseño una técnica que me gusta mucho utilizar, que es texturizar papel sobre el que he estampado previamente. La estampación queda muy bien y nos permite crear fondos de diferentes tipos.

****

It's already Spring and that's why today's video is about flowers. In today's video I want to show you some stamps that I discovered recently from the American brand Altenew, which I love!! It is a flower stamps in three layers, and simply stamping layer upon layer with different shades of the same color gives to the stamp depth and a very cool effect.

I'm also showing you a technique that I like to use, which is textured paper on which I stamp previously. The stamping stays very good and allows us to create different types of backgrounds.


Los materiales utilizados son:

- Sellos Vintage Flowers de Altenew
- Sellos Lia Griffith de Hero Arts (sello Hello)
- Sellos Label's Stamp and cut de Hero Arts (etiqueta)
- Tinta Frosty Pink de Altenew
- Tinta Grapevine de Altenew
- Tinta Evergreen de Altenew
- Tinta Forest Glades de Altenew
- Tinta Color Theory  Lime Light de Studio Calico
- Tinta Color Theory Blush Crush de Studio Calico
- Placa de textura Linear de We R memory Keepers
- Sizzix Big Shot
- Pegamento en gel de Scotch
- Tijeras de precisión Fiskars

****

The used supplies are:

- Altenew Vintage Flowers Stamp Set
- hero Arts Lia Griffith Stamps (Hello Stamp)
- Hero Arts Label's Stamp and cut 
- Frosty Pink Ink of Altenew
- Grapevine Ink Altenew
- Ink Evergreen Ink Altenew
- Ink Forest Glades Ink Altenew
- Ink Color Theory Lime Light Ink Studio Calico
- Ink Color Theory Blush Crush Ink Studio Calico
- Linear Embossing folder We R Memory Keepers
- Sizzix Big Shot
- Scotch adhesive gel
- Precision Scissors Fiskars

I hope you like these new stamp and the card I created with them. Thanks for stopping by here! See you in the next video!


Web y tienda on-line: http://www.scrapipebre.es
Facebook: http://fb.com/scrapipebre
Instagram: http://www.instagram.com/scrapipebre
Pinterest: http://www.pinterest.com/scrapipebre
Twitter: http://www.twitter.com/scrapipebre

lunes, 21 de marzo de 2016

Jornada de Scrap en Gandía - Hello Spring - 23 de abril de 2016

Hola hola! Después de unos días desaparecida entre Fallas, vacaciones y niños enfermos, ya estoy de vuelta para traeros una buena noticia! Y es que el próximo sábado, 23 de abril de 2016 tenemos Jornada de Scrap en Gandía!!


Haremos dos talleres en los que la temática en esta ocasión será el amor y la primavera, y es que ya se sabe, la primavera la sangre altera ;). Y como siempre todo el material y la comida estarán incluidos. El precio por persona es de 75€.

El programa será el siguiente:

9:30 - 10:00 Bienvenida
10:00 - 14:00 Taller de mini-album
14:00 - 15:30 Comida para reponer fuerzas
15:30 - 18:30 Taller de layout + elemento sorpresa

Qué ganas de scrap, amigas y buen tiempo! Además tendremos una rica merienda, sorteos y más sorpresas. Os animáis?? Para reservar vuestra plaza podéis enviar un mail a scrapipebre@gmail.com o llamar al 608074649. Plazas limitadas!! Os espero!!


martes, 15 de marzo de 2016

Proyecto de Pascua - Cómo decorar una huevera // Easter Project - How to decorate an egg-cup


Hola hola! Ya se va acercando la Pascua y no puedo evitar empezar a pensar en proyectos relacionados con esta fiesta tan bonita que nos trae de pleno a la primavera. Por eso, en el vídeo de hoy os traigo un proyecto bien sencillo, para el que necesitáis muy poquitos materiales. Se trata de una huevera pintada y decorada, para regalar los huevos pintados tan típicos de la Pascua.

****

Hey friends! Easter is approaching and I already started thinking about projects related to this beautiful holiday that brings us full spring. Therefore, in today's video I want to show you a very simple project, for which you need very few materials. This is a painted and decorated egg cup, to give as present painted eggs this Easter.


Materiales utilizados:

- Huevera de cartón de 6 huevos
- Pintura Chalk color Menta de Artis Decor
- Brocha de pelo suave
- Cartulinas texturizadas blanca y rosa de Mahé
- Colección "Jardin Secret" de la marca Toga, distribuida en España por Basic Crea http://www.basiccrea.eu (papel estampado, chipboard, enamel dots)
- Cinta de raso de mercería (6mm de grosor)
- Cinta de doble cara http://goo.gl/9fqL2F
- Cuadraditos adhesivos http://goo.gl/PTsPRR
- Pegamento en gel de Scotch http://goo.gl/J9ey0D
- Corner Chomper (para redondear las esquinas) http://goo.gl/YjjEaO
- Tijera grande de Teresa Collins http://goo.gl/vRG1jA
- Sellos de etiqueta de Studio Calico http://www.studiocalico.com
- Tintas rosa y turquesa Color Theory de Studio Calico http://www.studiocalico.com

Medidas:

- Cartulina blanca: 12x7cm
- Cartulina rosa: 11,5 x 6,5cm
- Papel estampado: 11x6cm

Espero que os haya sido útil y que lo pongáis en práctica! Gracias por pasar por aquí! Nos vemos en el próximo vídeo!

****

Used supplies:

- Egg-cup for 6 eggs
- Chalk Paint Mint Color from Artis Decor
- Soft hair brush
- Textured cardstock (white and pink) Mahé
- Collection "Jardin Secret" of the Toga brand, distributed in Spain by Basic Crea http://www.basiccrea.eu (pattern paper, chipboard, enamel dots)
- Satin ribbon from haberdashery (6mm thick)
- Double-sided tape http://goo.gl/9fqL2F
- 3D foam squares http://goo.gl/PTsPRR
- Scotch gel glue http://goo.gl/J9ey0D
- Corner Chomper (to round the corners) http://goo.gl/YjjEaO
- Large scissors from Teresa Collins http://goo.gl/vRG1jA
- Label stamps from Studio Calico http://www.studiocalico.com
- Pink and teal Color Theory Inks from Studio Calico http://www.studiocalico.com

Measurements:

- White cardstock: 12x7cm
- Pink Cardstock: 11.5 x 6.5 cm
- Pattern Paper: 11x6cm

I hope you find It useful! Thanks for stopping by! See you in the next video!


Web y tienda on-line: http://www.scrapipebre.es
Facebook: http://fb.com/scrapipebre
Instagram: http://www.instagram.com/scrapipebre
Pinterest: http://www.pinterest.com/scrapipebre
Twitter: http://www.twitter.com/scrapipebre

viernes, 11 de marzo de 2016

Mini álbum "Vamos al parque" - Colaboración con Basic Crea

Hola hola! Hoy estoy super feliz de poder contaros que me estreno en el blog de Basic Crea como colaboradora. Y en mi primera entrada os he preparado un álbum infantil de un día en el parque, utilizando la colección Hiboux de la marca Toga, distribuida por Basic Crea. Si so apetece el mini al completo solo tenéis que pinchar en la imagen. Hasta pronto!

****

Hey friends! I'm super happy to tell you that I releaseas collaborator on the Basic Crea blog today. And in my first post I have prepared a children's album about a day in the park, using the collection Hiboux by Toga, distributed by Basic Crea. If you want to see the complete mini album jusr click on the image. See you soon!


jueves, 10 de marzo de 2016

Elige propósito en lugar de compra - Choose purpose over purchase

Hola gente bonita! Hoy vengo a enseñaros otra de las hojas de mi Cuaderno creativo. Igual ya la vísteis en el vídeo del otro día, pero no os he hablado de ella y creo que es muy importante hacerlo.

Una de las cosas que he aprendido tanto en el libro del que os he hablado varias veces, Make It Happen, como de la Biblia, es que buscamos en vano la satisfacción en la compra de cosas que la inmensa mayoría de veces ni siquiera necesitamos. Y digo en vano porque no hay nada material que pueda llenarnos de satisfacción de una forma permanente. Estamos cayendo en una espiral social de consumo excesivo que no nos hace ningún bien ni a nosotros ni menos todavía al planeta en el que vivimos, que dicho sea de paso está para tirar a la basura gracias a nosotros (os recomiendo muchisimo el documental Diez Mil Millones, donde podéis ver la situación real en la que nos encontramos). Lo que quiero decir es que tal vez deberíamos pararnos a pensar en el consumo que hacemos y plantearnos si es un consumo responsable. Si es así, enhorabuena, formas parte de ese pequeño porcentaje de gente que está actuando con conciencia, pero si no es así, por qué no nos planteamos qué podemos hacer para cambiar?

****

Hello beautiful people! Today I come to share another spread of my creative notebook. You may saw It in the video the other day, but I have not talked about it and I think it's very important to do It.

One of the things I've learned in the book that I have spoken several times, Make It Happen, and the Bible, is that we look in vain satisfaction in buying things that the vast majority of times we don't even need. And I say in vain because there is nothing material that can fill us with satisfaction on a permanent basis. We are falling into a social spiral of excessive consumption that does not make any good to us or even less to the planet on which we live, which by the way is to throw away because of us (I recommend a lot the documentary Ten Billions where you can see the real situation in which we find ourselves). What I mean is that maybe we should stop and think about the way we consume and ask ourselves if It's responsible consumption. If so, congratulations, you're part of that small percentage of people who are acting with awareness, but if not, why not ask ourselves what we can do to change?


En casa ya hemos elegido propósito en lugar de compra. Con esto quiero decir que hemos decidido vivir con propósito, dirigiendo nuestra vida hacia lo que de verdad importa, nuestras familias y amigos, y nos dirigimos a fomentar que todas las actividades que realizamos estén vinculadas a enriquecer esas relaciones y no vinculadas a irse de compras o el simple hecho de consumir. Con esto no quiero decir que no vamos al cine o a cenar fuera o que hemos dejado de comprar ropa o aquello que necesitemos, pero lo hacemos con consciencia de lo que significa ese consumo y asegurándonos que compramos aquello que en ese momento es imprescindible. Tan solo os propongo un pequeño ejercicio, cuando vayáis a comprar algo que se sale de vuestra lista de la compra, aquello que puede considerarse un capricho, que lo cojáis y os preguntéis, ¿esto es realmente necesario?¿esto realmente me va a hacer más feliz de lo que soy sin tenerlo? Si es material de scrap o papelería seguro que la respuesta es sí, jeje, pero si somos sinceros con nosotros mismos tal vez nos demos cuenta que de eso mismo ya tenemos cantidad más que suficiente y que no nos hace falta más.

Y no quiero que nadie me malinterprete, estoy lejos de querer decirle a nadie lo que tiene que hacer o lo que es correcto o no lo es, simplemente os expongo mi punto de vista y si a alguien le sirve de ánimo para iniciar un estilo de vida un poquito más consciente, yo ya soy feliz.

****

At home we have chosen purpose rather than purchase. By this I mean we have decided to live with purpose, directing our lives toward what really matters, our families and friends, and headed to encourage that all our activities are linked to enrich these relations and unrelate them from to go shopping or simply consume. With this I do not mean we are not going to cinema anymore or out to dinner or we have stopped buying clothes or what we need, but we do it with awareness of what it means that consumption and ensuring we buy what at that time is essential. Only I will propose a little exercise, when you go to buy something that is out of your shopping list, what can be considered a fad, just ask yourself, is this really necessary? Does this really make me happier than I am without it? If It's scrapbooking supplies or stationery sure the answer is yes, hehe, but if we are honest with ourselves perhaps we realize that this same we already have more than enough and we do not need more.

And I do not want anyone to misunderstand me, I am far from wanting to tell anyone what to do or what is right or it is not, simply I expose my point of view and if anyone finds the mood to start a style of life a little more aware, I'll be more than happy.


Y diréis, qué hipócrita, con todo el material de scrap que tiene y las agendas que nos enseña y la tienda on-line que fomenta el consumo de material de scrap.. A lo que yo os contesto, en la mayoría de mis vídeos os enseño a crear proyectos utilizando lo que ya tenéis por casa, sin necesidad de que compréis todo lo que yo utilizo, siempre busco que haya una opción más económica y los kits que preparo y vendo en mi tienda son precisamente para que podáis hacer proyectos enteros, sin necesidad de comprar toda la colección concreta, con todos los elementos que lleva a juego, con los sellos, troqueles, etc, sino un único paquete de material en el que tenéis la cantidad necesaria para crear vuestro proyecto y listo. Y por otro lado, me he quitado de las suscripciones a materiales de scrap que tenía, estoy regalando a amigos de cerca y de lejos material que tengo de sobra y que no estoy utilizando y no tengo pensado comprar nada más de lo que sea necesario, como consumibles que se terminan y cosas así (o por lo menos es lo que llevo haciendo durante el último mes y tengo pensado seguir así). Y sí, me retiro de la compra de agendas que luego no se ni para qué utilizar. Simplemente, voy a hacer un consumo más responsable, porque al fin y al cabo, es lo que quiero enseñar a mis hijos y dar ejemplo es lo que mejor podemos hacer.

Vosotros qué elegís? Propósito o compra?

Gracias por pasar por aquí y perdonad el rollo, pero me apetecía contaros los cambios que estoy haciendo en mi vida y que tan bien me hacen sentir.

Para aquellos que os sentís cerca de Dios, os dejo este link de un sermón que me encantó escuchar, en él se esconde el secreto de la felicidad :)

https://www.youtube.com/watch?v=XYqVYExiTg0

****

And you say, what a hypocrite, with all the scrapbooking supplies she has, and her shop online that encourages the consumption of these supplies.. What I will answer is, in most of my videos I try to show you how to create projects using what you already have at home, without the need for you to buy everything I use, always looking to give you a cheaper option. And about the kits that I prepare and sell in my shop are just so you can make the whole project, without buying the entire collection , with all the matching elements , with stamps, dies, etc., but a unique package of material where you will find the needed amount of supplies to create your project. On the other hand, I have taken out subscriptions to scrapbooking supllies I had, I'm giving away to friends near and far supplies I have to spare and I'm not using and I have no plans to buy anything more than necessary, as consumables that are finished and things like that (or at least that's what I've been doing for the last month and I plan to stay that way). And yes, I get out of purchasing agendas that then do not even know what to use them for. Simply, I'll make more responsible consumption, because after all, is what I want to teach my children and giving  example to them is what we can do best.

What do you choose? Purpose or purchase?

Thanks for stopping by and forgive the blah blah bñah, but I wanted to tell the changes I'm doing in my life and that are making me feel so good.

For those who you feel close to God, I leave this link to a sermon I loved listening to him the secret of happiness lies :)

https://www.youtube.com/watch?v=XYqVYExiTg0


miércoles, 9 de marzo de 2016

Cómo imprimo mis fotos - Impresoras y aplicaciones // How I print my photos - Printers and App's

Hola hola! Hoy vengo a contaros cosas sobre la pregunta que más veces me habéis hecho últimamente: Cómo imprimo mis fotos y qué programas utilizo para hacer los montajes. Os he preparado este pequeño vídeo, pero también os dejo toda la info debajo.

****

Hey friends! Today I come to talk about the question most often you have asked me lately: How do I print my photos and what programs I use to make the collages. I have prepared this little video, but I leave all the info below.


La impresora más habitual que utilizo es la Canon Selphy, que imprime en papel fotográfico de 10x15cm. Pero el tamaño que más me gusta utilizar es el de 7,5x10cm (dos fotos en una hoja de 10x15) junto con el de 7,5x5cm (cuatro fotos en una hoja de 10x15). Los recambios de tinta y papel me cuestan 30€ por 108 hojas de 10x15 con la tinta para esa cantidad de hojas, lo cual sale más barato que imprimir en tienda de fotos.

Para hacer el montaje de las fotos utilizo una aplicación del móvil que se llama FrameFree, es gratuita y muy sencilla de utilizar.

Pero cuando quiero imprimir fotos más pequeñas o en cambio, más grandes que una 10x15, utilizo mi impresora Canon MG3550. Es una impresora normal de inyección de tinta, que imprime a tamaño A4. Y para conseguir la calidad foto, imprimo sobre papel fotográfico tamaño folio, de la marca Canon (es el Glossy paper photo). Lo venden en paquetes de 100 hojas, por 30€ en MeriaMarkt. Y sale muy muy rentable!

Para hacer los montajes en el ordenador, utilizo programas como el Power Point o incluso el Word. Abro un documento nuevo, inserto las imágenes que quiero imprimir y les doy el tamaño que quiero y listo para imprimir.

Espero que os haya gustado el vídeo y sobre todo que os haya sido útil! Cualquier pregunta más que tengáis, me la podéis dejar debajo y os contestaré encantada!

Hasta el próximo vídeo!

****

The most common printer I use is the Canon Selphy, which prints on photo paper 10x15cm. But the size I like to use is 7,5x10cm (two photos on one sheet of 10x15) along with the 7,5x5cm (four pictures on one sheet of 10x15). The ink and sheets are 30 € per 108 sheets of 10x15 with ink for that amount of paper, which works out cheaper than printing on photo shop.

To make assembly of the photos I use a mobile application called FrameFree, it is free and very easy to use.

But when I want to print smaller or instead, larger than a 10x15 photos, I use my printer Canon MG3550. It is a normal inkjet printer, which prints to A4 size. And to get the picture quality I print on photo paper A4 size, the Canon brand (the Glossy photo paper). It is sold in packages of 100 sheets, for 30 € in MeriaMarkt. And is very very profitable!

To make the collages on the computer, I use programs like Power Point or Word. I open a new document, insert the images you want to print and give them the size you want and ready to print.

I hope you liked the video and especially that It has been helpful! If you have any other question, please leave It below and I will answer with pleasure!

See you in the next video!


Web y tienda on-line: http://www.scrapipebre.es
Facebook: http://fb.com/scrapipebre
Instagram: http://www.instagram.com/scrapipebre
Pinterest: http://www.pinterest.com/scrapipebre
Twitter: http://www.twitter.com/scrapipebre

viernes, 4 de marzo de 2016

Mi cuaderno creativo - Tintas Distress y pasta de modelar // My creative Notebook - Distress Inks and modeling paste

Hola hola! En el vídeo de hoy quiero enseñaros cómo trabajo en uno de mis cuadernos creativos. Es un espacio que utilizo para dejarme llevar y crear fondos para frases que me inspiran y que me hacen sentir bien, donde puedo probar productos y técnicas a las que no estoy acostumbrada.

****

Hey friends! In today's video I want to show how I work in one of my creative notebooks. It is a space I use to leave my creativity flow and create backgrounds for quotes that inspire me and make me feel good, where I can test products and techniques that I'm not used to.


Los materiales que utilizo son los siguientes:

- Tintas Distress (mustard seed, seedless preserves, evergreen bough)
- Aplicador tintas Distress
- Pasta de modelar de Teressa Collins
- Acuarelas escolares
- Acuarela líquida amarillo ocre
- Máscara plumas
- Máscara estrellas de Kesi-Art
- Alfabetos de colecciones de Echo Park, Basic Grey y Studio Calico.
- Sello X de SODAlicious
- Sello rayas de Prima Marketing
- Washi tapes
- Enamel dots

El versículo que escribo es Filipenses 4:6, que dice así:

"Por nada estéis afanosos, sino sean conocidas vuestras peticiones delante de Dios en toda oración y ruego, con acción de gracias"

Gracias por pasar por aquí y si tenéis cualquier duda sobre el proceso, dejadme un comentario y os contestaré en breve. Nos vemos en el próximo vídeo!

****

The supplies I use are:

- Distress Inks (mustard seed, seedless preserves, evergreen bough)
- Distress inks Applicator
- Modeling paste of Teressa Collins
- School Watercolors
- Liquid Watercolor ocher yellow 
- Feather stencil
- Stars stencil Kesi-Art
- Alphabets collections of Echo Park, Basic Grey and Studio Calico.
- Stamp X's Sodalicious
- Stamp stripes Prima Marketing
- Washi tapes
- Ennamel dots

The verse I write in my journaling is Philippians 4:6 and It says:

"Do not be anxious about anything, but in every situation, by pryer and petition, with thanksgiving, present your requests to God".

Thanks for stopping by and if you have any questions about the process, leave me a comment and I will answer you soon. See you in the next video!


Web y tienda on-line: http://www.scrapipebre.es
Facebook: http://fb.com/scrapipebre
Instagram: http://www.instagram.com/scrapipebre
Pinterest: http://www.pinterest.com/scrapipebre
Twitter: http://www.twitter.com/scrapipebre

jueves, 3 de marzo de 2016

Semanas 7 y 8 - 2016 Documented - Weeks 7 & 8

Hola hola! Estoy cogiendo la costumbre de actualizar mi proyecto "2016 Documented" cada dos semanas y me esta gustando mucho. Así junto las fotos de las dos semanas y ahorro tiempo haciendo montajes e imprimiendo fotos y en el proceso mismo. Estamos al día y ya tengo el mes de febrero terminado, así que aquí os lo enseño.

En esta ocasión he utilizado la colección "Sweet Love" de la marca Toga, que distribuye Basic Crea en España, que tiene una cantidad de elementos decorativos a juego de los papeles que es increible: brads, stickers, elementos de madera, pegatinas epoxy, diecuts, letras doradas en rub-on, cintas de tela.. Ideal para cualquier proyecto! Y los rub-on, pegatinas y die cuts me han venido genial para decorar mi agenda.

****

Hey friends! I'm taking the habit of updating my project "2016 Documented" every two weeks and I like it a lot. I print together the pictures of the two weeks and saves me time doing assembly and printing photos and in the process itself. I have this project updated and I just finished the month of February, so here you have It.

This time I used the "Sweet Love" collection by the french brand Toga, distributed by Basic Crea in Spain, and It has a number of embellishments matching the pattern papers that amaze me: brads, stickers, wooden elements, epoxy stickers, diecuts, gold letters on rub-on, fabric ribbon.. Perfect for any project! And the rub-on, stickers and die cuts have been great for decorate my planner.


Semana 7 // Week 7


Semana 8 // Week 8


Espero que os haya gustado y que os haya servido descubrir esta preciosa colección, si no la conocíais hasta ahora. Gracias por pasar por aquí y si tenéis cualquier duda, ya sabéis, dejadme un comentario debajo y me encantará responderos! Nos vemos en el próximo post!

****

I hope you liked it and you liked this beautiful collection, if It's new for you. Thanks for stopping by and if you have any questions, you know you can leave me a comment below and I'd love to answer you! See you in the next post!


miércoles, 2 de marzo de 2016

DIY Collection de Miquel Rius - Cómo decorar una libreta

Hola hola! En el vídeo de hoy os enseño el contenido de una de las DIY Collection Box de Miquel Rius, y la forma de sacarle el máximo provecho. Se trata de un paquete de material que incluye una libreta kraft tamaño A5 de tapa dura, unas máscaras de plástico muy versátiles, papel estampado a doble cara, pegatinas a juego y cuatro rollos de washi tape.

Os enseño cómo decorar la portada y una manera muy fácil para crear tus propios separadores, utilizando nada más que lo que incluye este precioso paquete. Lo podéis conseguir en muchas librerías locales y en grandes superficies como El Corte Inglés o Carrefour.

****

Hey friends! In today's video I show the contents of a DIY Collection Box from Miquel Rius, and how to make the most of It.This is a package of paper craft supplies that includes a kraft A5 size notebook with hardcover, very versatil plastic masks, double-sided patterned paper, matching stickers and four rolls of washi tape.

I show you how to decorate the cover and a very easy way to create your own tabs, using nothing but the included supplies in this beautiful package. You can get It at many local bookstores and superstores such as El Corte Inglés or Carrefour.


Os dejo el enlace a la web de Miquel Rius para que veáis si os apetece la cantidad de material de papelería bonito que tienen.

http://www.miquelrius.com

Espero que os haya resultado útil este vídeo y si os ha gustado, me encantará recibir un mensajito, así que podéis darle el Me Gusta y dejarme un comentario debajo! Nos vemos en el próximo vídeo!

****

Here you have the link to the website of Miquel Rius just in case you wanna take a look to all the gorgeous stationery products they have.

http://www.miquelrius.com

I hope you found this video useful and if you liked it, I'd love to receive a little message, so you can give me some love by leaving a comment below! See you in the next video!


Web y tienda on-line: http://www.scrapipebre.es
Facebook: http://fb.com/scrapipebre
Instagram: http://www.instagram.com/scrapipebre
Pinterest: http://www.pinterest.com/scrapipebre
Twitter: http://www.twitter.com/scrapipebre